Pattern: Geranium Dress by Made by Rae, cap sleeves with pleated skirt and yes, POCKETS!
Size: 2T
Fabric: Panel of Marimekko fabric Ive been hoarding for years
This was a really straightforward sew - the fun part working out the position of the pattern on the fabric so that the very very very large scale pattern would work on such a little dress. Sizing wise it fits M pretty well, with enough length to last a bit, I hope!

Pattern: Oliver & S Ice Cream Dress sz 2T
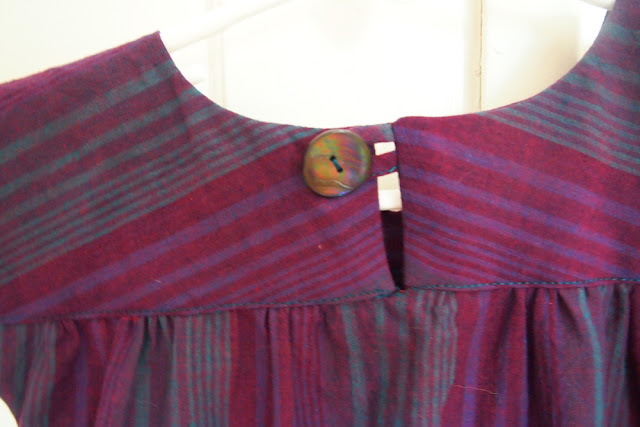
Fabric: Kaffe Fassett Shot Cotton stripes
Notions: one buttons from the button stand at the Bastille market in Paris.
This pattern + fabric = dreamy! I want to draft it in my size. The fabric is so soft and light and the perfect weight and drape for this pattern - the dress hangs just perfectly!
I wanted to play with the stripes and the panels of the pattern so I cut the yoke on the cross grain (hoping that the double layer of the yoke will make up for it not being on the grain to hold the weight of the dress) and alternating stripe direction on the other pieces.
One modification I made was to cut the blouse panel instead of the center dress panel for a different proportion to the dress. BEWARE! The bottom hem will be ever so slightly off so trace the bottom panel pattern and measure and redraft it so that it will fit onto the bottom of the blouse piece.
The construction of the Ice Cream Dress is rather clever, all the seams are finished by sewing them. Love that.
Pattern: Geranium Tunic by Made by Rae, Tunic with no sleeves
Size: 2T
Fabric: African Wax Print
Notions:Three vintage bakalite buttons from my old job again.
I love this pattern. This tunic was an easy adaptation from the dress I made before. I cut the pattern originally to take advantage of the pattern to make a sort of faux "ruffle" at the front of the bodice. The pattern is so crazy (in a good way!) that I thought maybe it would be a good idea to play with the pleats and see if I could make the front of the dress make a little more sense under that medallion ruffle thing. By pulling the center pleat in it also made it a little more angular, also in a good way.
I received a few questions about how to do the modification to the skirt. I cut the skirt front as normal for the pleated version of the dress and pinned the two center pleats as drafted. Pressed the top of the pleat lightly and then pulled the pleats to meet in the center (creating an inverted pleat), pinned and pressed, and then made up the difference with the two side pleats. Make sure to measure the bottom of the front bodice length to get the length you need to pleat to get the skirt to fit perfectly. Pleats are only difficult because they have to be precise, but if you do measure and adjust and pin and press before sewing, I promise it will be easy!

I love how the medallions are on both shoulders. It was a lot of fun to play with this pattern and figure out how to make it work on such a small little tunic. I also want to make myself some tops with different prints too!
I really enjoyed taking part in Kid's Clothes Week. I felt the inertia of the last few months disappear, and its made me really excited to get sewing and more importantly finish projects! I will absolutely be joining in each season!
To see more about the process, check out my previous posts about Kids Clothes Week:
KCW - a kick in the pants (or participating in Kids Clothes Week)
KCW Spring - Update on days 2 + 3 of Kids Clothes Week
KCW Spring - Update on days 4 + 5 of Kids Clothes Week
KCW Spring - Update on days 6 + 7 of Kids Clothes Week 2013


No comments:
Post a Comment